Roles & Permissions
The application uses Spatie Laravel Permission to provide a production-ready RBAC system. You can create roles, assign permissions in a clean pill-style UI, and assign roles to users - all without touching code.
The admin design is based on the Vendventory admin interface. Branding colors are driven by the Primary and Secondary colors configured in Settings → Branding.
Dark mode is supported. Users can switch the overall theme from Settings → Branding, and the admin UI updates accordingly.
The user created in Step 6 of the installer is automatically assigned the Admin role.
The Admin role has all permissions and cannot be edited or deleted. This prevents accidental lockouts and keeps deployments safe for buyers.
- The roles index behaves like a live permission preview surface instead of a plain table.
- Role create and update flows save asynchronously with confirmation and feedback.
- The Permission Glossary is now an editable metadata layer with module, risk, title, description, sort order, and visibility controls.
- Risk-aware glossary metadata helps administrators understand sensitive and critical permissions before assignment.
1) Module overview
Roles and permissions are stored using Spatie's standard tables (roles, permissions, role_has_permissions, and model_has_roles). Ovion extends the permissions table with extra metadata so buyers can understand each permission (what it does, which module it belongs to, and how risky it is) before assigning it to a role.
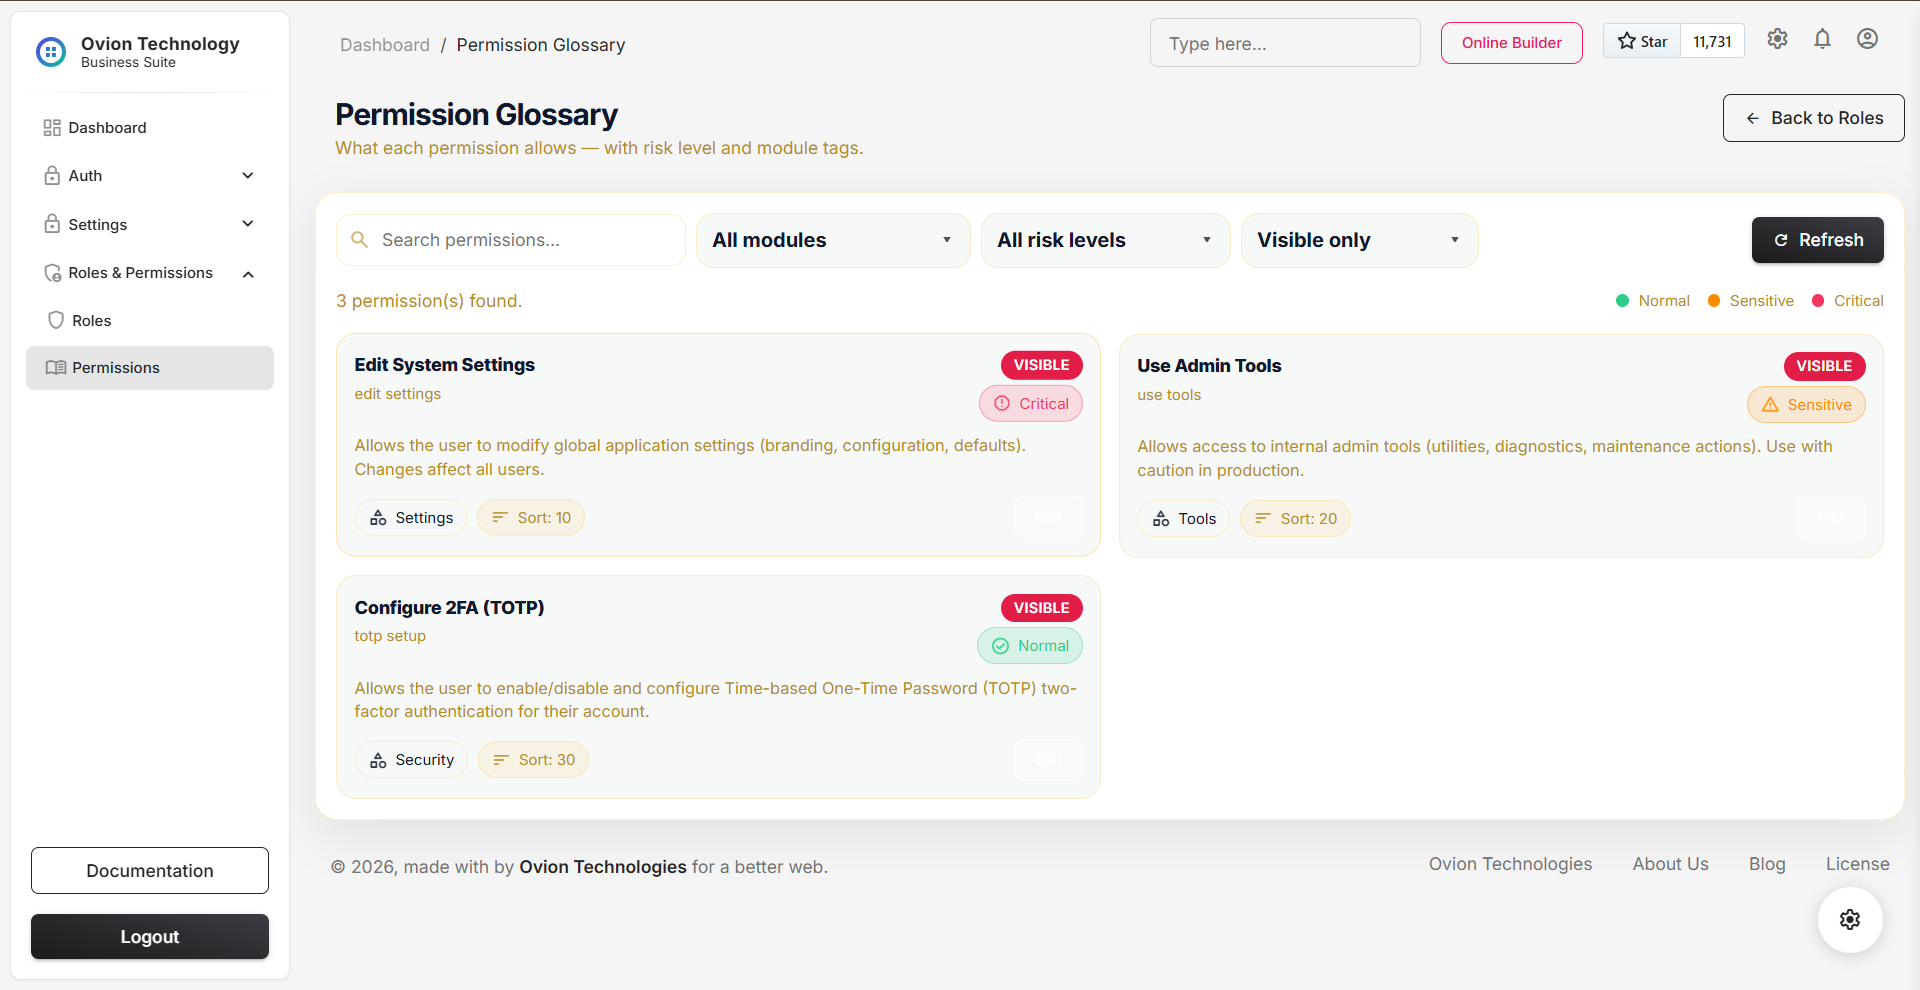
2) Permissions glossary
The permissions glossary is a buyer-friendly view of all permissions. Each permission includes a title, description, module, and risk level so the meaning is clear even for non-technical admins.
documentation/assets/media/roles/permissions-glossary.png
Schema::table('permissions', function (Blueprint $table) {
    $table->string('title')->nullable()->after('name');          // Friendly name
    $table->text('description')->nullable()->after('title');     // What it does
    $table->string('module')->nullable()->after('description');  // e.g. Users, Settings
    $table->string('risk')->default('normal')->after('module');  // normal|sensitive|critical
    $table->unsignedInteger('sort_order')->default(0)->after('risk');
    $table->boolean('is_glossary_visible')->default(true)->after('sort_order');
});pre/code
colors. (Same fix applies across all docs pages.)
- title: A readable label shown in the UI (example: Manage Users).
- description: Explains what the permission allows (example: Create, update, deactivate users).
- module: Groups permissions by feature area (Users, Settings, Sales, etc.).
- risk: Visual warning level: normal (safe), sensitive (private data / meaningful impact), critical (security, money, or core system behavior).
- sort_order: Keeps permissions listed in a clean, predictable order.
- is_glossary_visible: Controls whether the permission appears in the glossary UI (useful for internal/system-only entries).
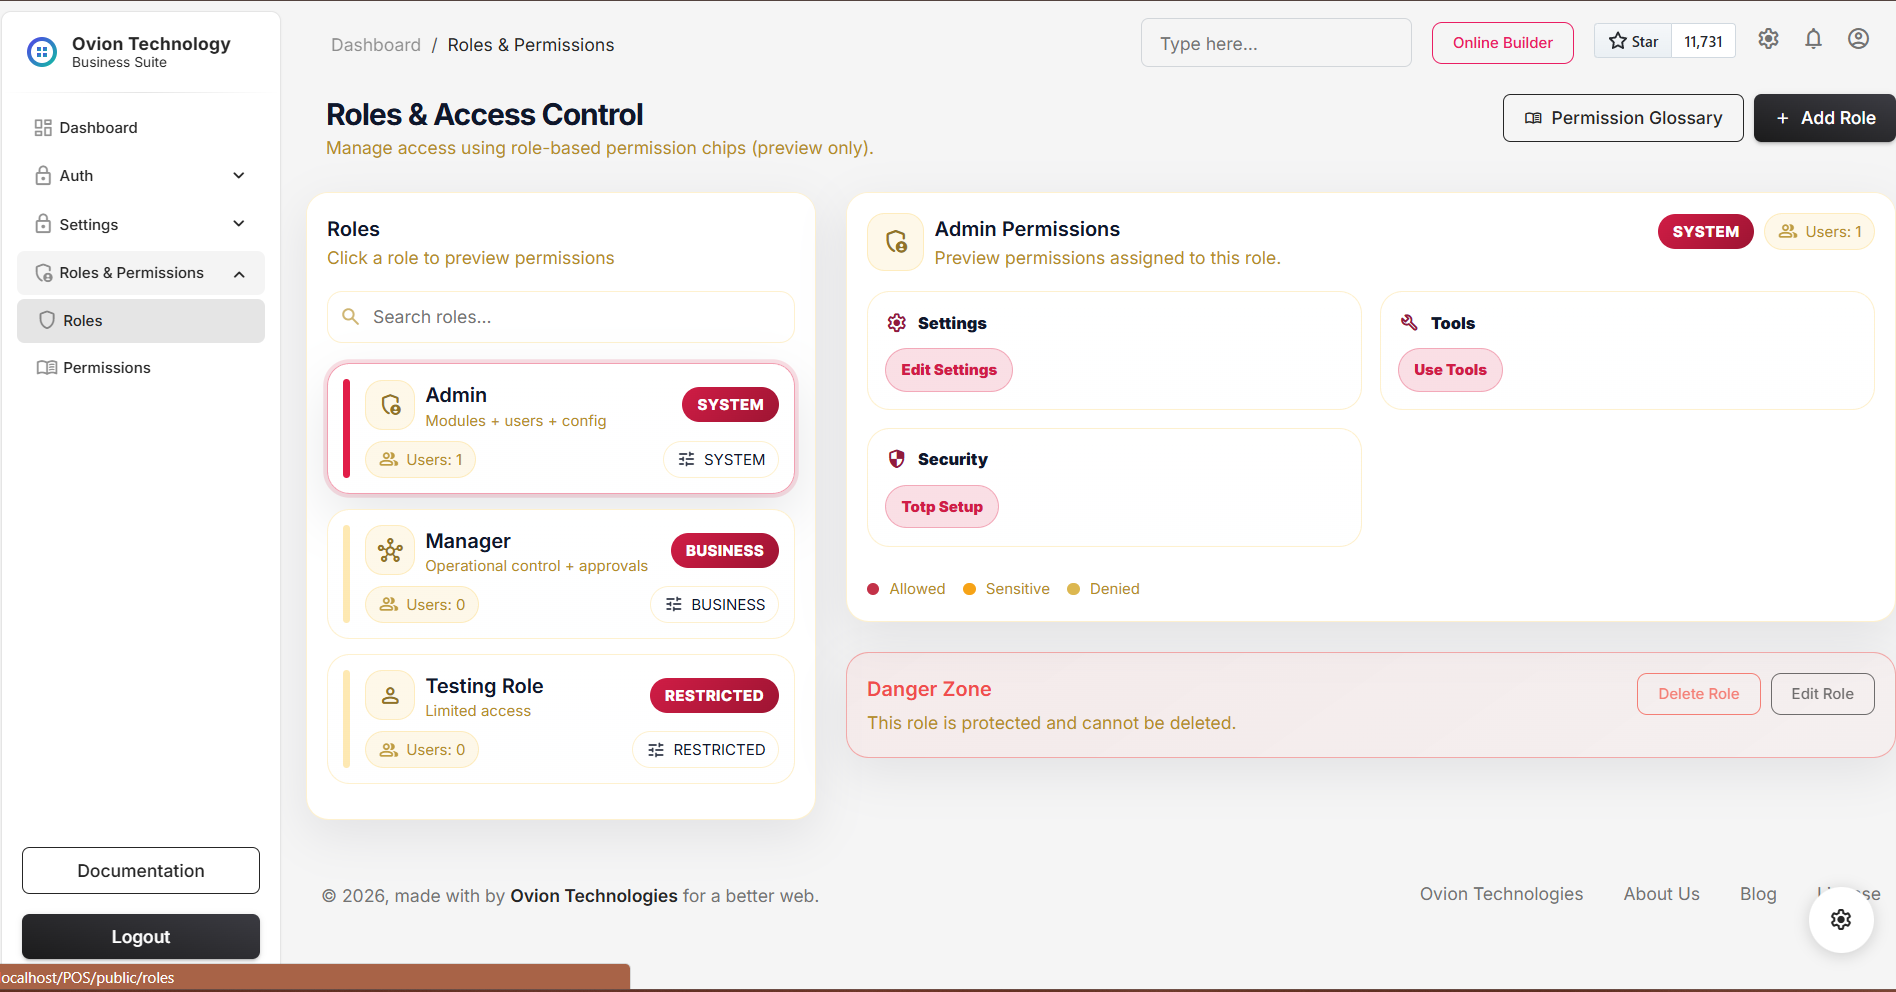
3) Roles list
The Roles page lists all roles with quick visibility of what exists in the system. From here, admins can create new roles (for teams, branches, and job functions) and manage access in a structured way.
documentation/assets/media/roles/role-index.png
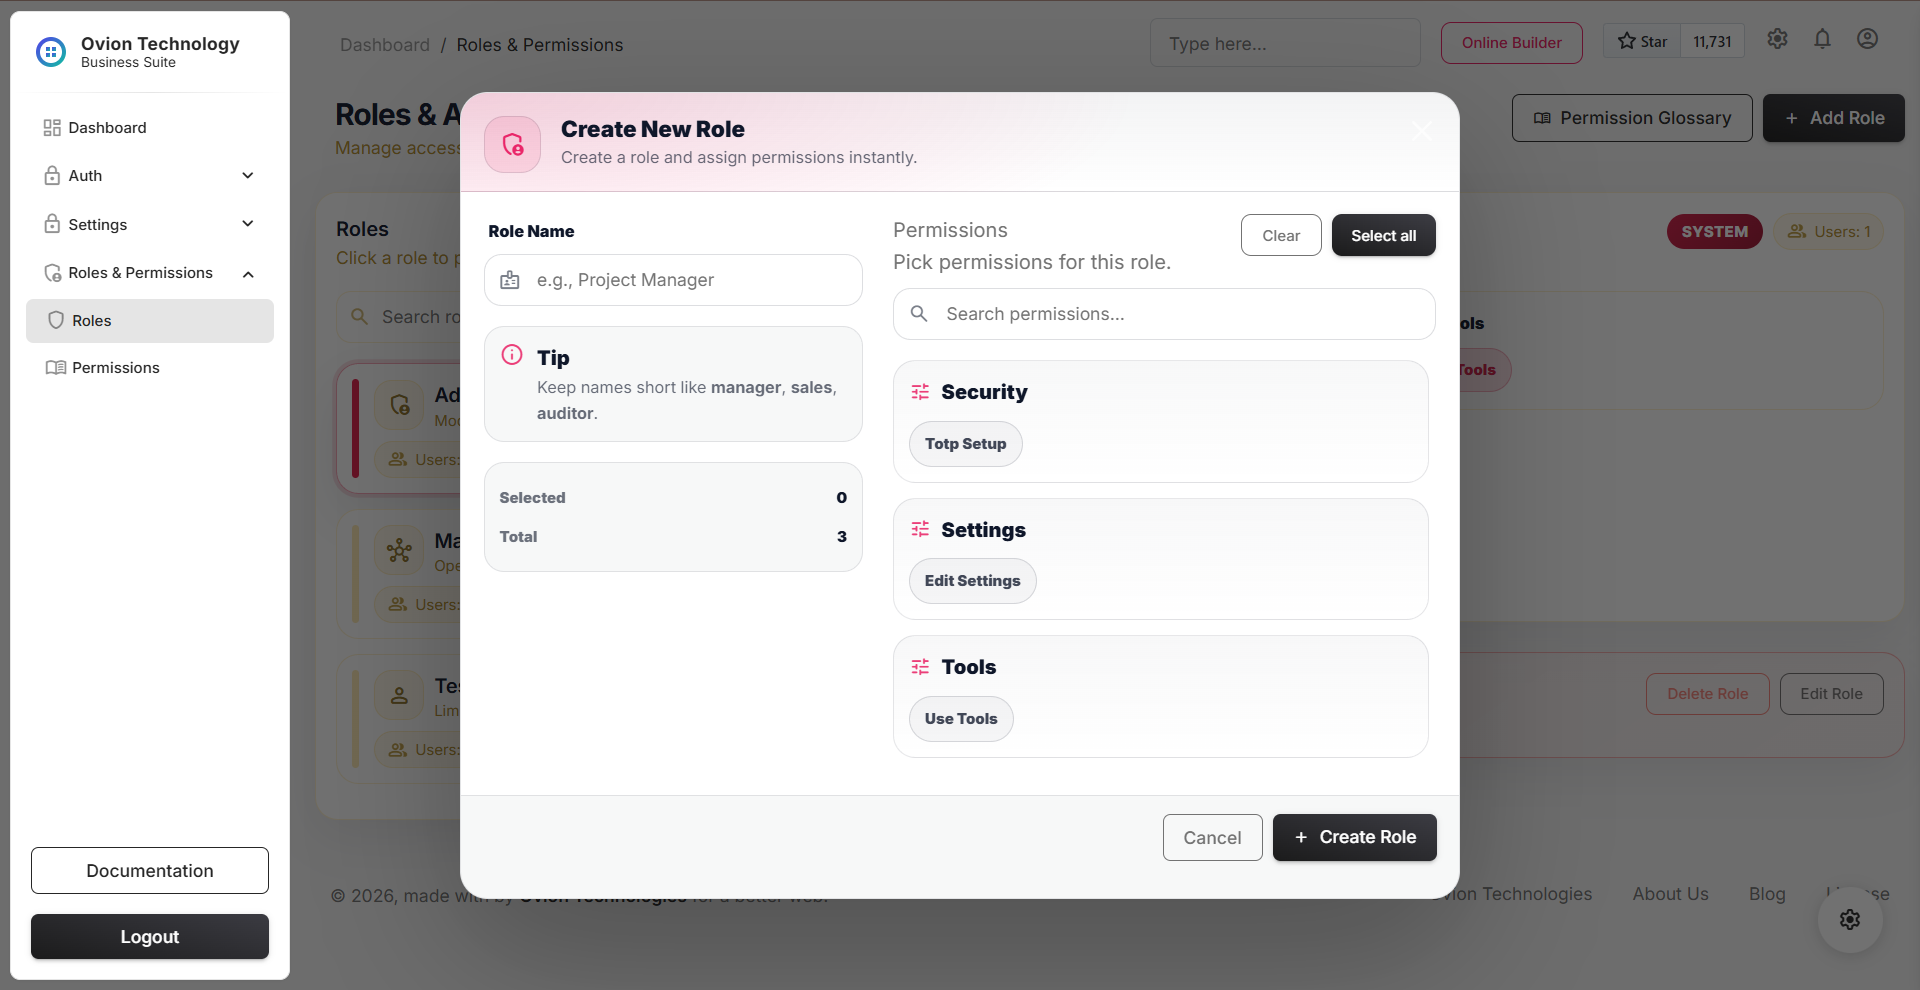
4) Create role (pill-style selection)
Creating a role is intentionally simple. Permissions are displayed as clickable "pills". Clicking a permission toggles it on/off, making it easy to build roles without scrolling through long checkbox lists.
documentation/assets/media/roles/role-create.png
-
The role is created in the
rolestable. -
Selected permissions are stored in
role_has_permissions. - The role becomes immediately available for assignment to users.
5) Assign roles to users
From the Assign Role screen, roles are attached to
users. This updates Spatie's
model_has_roles table. Once assigned,
access rules apply immediately across the admin panel
(menus, pages, actions, and protected routes).
- UI hides what a user should not see (menus and buttons).
- Server-side authorization blocks restricted routes and actions (real security).
- Security-sensitive actions can trigger admin notifications (in-app, and email where enabled).